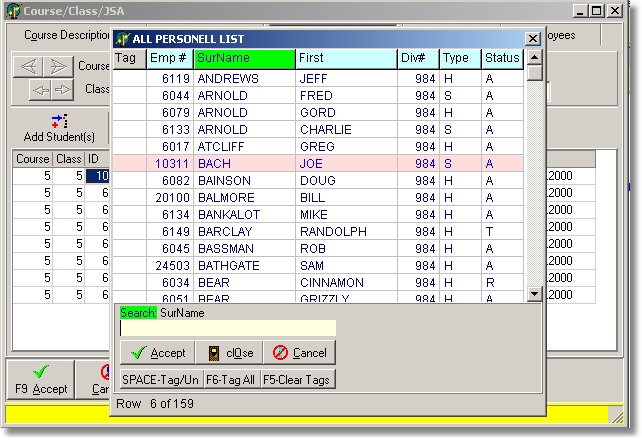
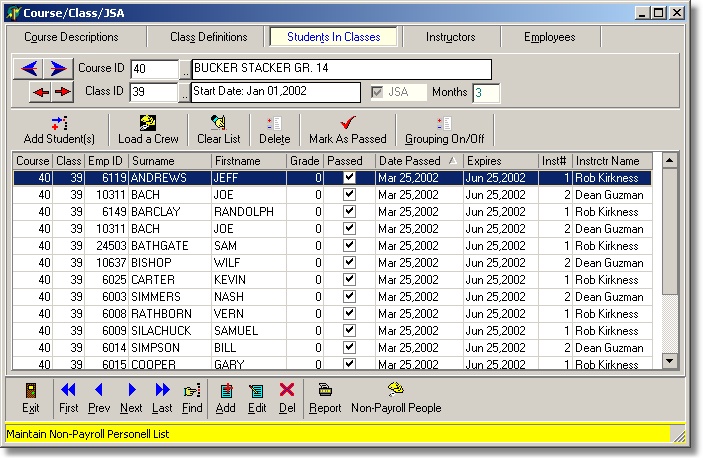
Click the 'Add' button on the task bar or the 'Add Student(s)' button and the following list will be displayed. Select student(s) from the look-up list. Use the tag option to select more than one at a time.
| Table of Contents |
This module allows the user to create and maintain Courses, Classes and Students (employees) taking the courses. Courses can be flagged to use the 'Expiry Date' option or not. For instance; if the course is for a 'Job Safety Awareness' (JSA) then it should be flagged to calculate Expiry Dates when a student is entered onto a class list and to show as an available course to be reported on in the JSA report. If the course does not need an Expiry Date then this flag can be left unchecked.
Note: the word student and employee are synonymous in this documentation.
A Course definition record is the highest level of the Course/Class/Student hierarchy.You may elect to define only one class per course and maintain only one list of students in the class or you may want to have multiple classes and students of.
| 1 CLASS | MULTIPLE CLASSES | |||
| Start Jun 1,00 | Start Jan 1,01 | Start Jun 1,01 | Start Jan 1,02 | |
| Employee 1 | Employee 1 | Employee 1 | Employee 1 | |
| Employee 2 | Employee 2 | Employee 2 | Employee 2 | |
| Employee 3 | Employee 3 | Employee 3 | Employee 3 | |
| Employee 4 | Employee 4 | Employee 4 | Employee 4 | |
| Employee 2 | ||||
| Employee 3 |
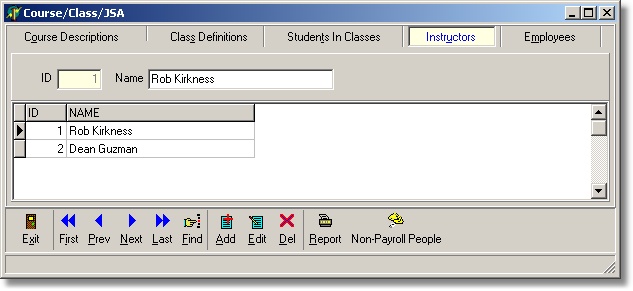
You will need to define at least one instructor before creating classes. When adding a new instructor the system will automatically generate the ID number.
When adding a new Course the system will automatically generate the course number. You will have to complete the following:
Title: enter a name for the course.
Memo/Details: enter a description of the course content.
Active: check this box if the course is considered to be active. (Some courses may no longer be available or current but need to be kept for history. By changing the status to inactive (unchecked) the records will be retained but will not show on the reports unless explicitly requested to.
Use Expiry Dates: check this box if the course is to use the Expiry Dates options for reports and when entering students in a class.
Months Valid: enter the number of months the course is valid for if you checked 'Use Expiry Dates'.
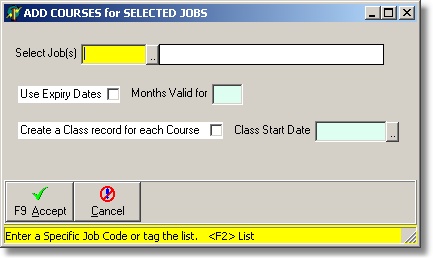
Note: The 'Add Job/Courses' button on the menu bar is a utility routine to assist in initially setting up courses for jobs. If want to define a course for each job or multiple jobs then click the 'Add Job Courses' button and the following window will be displayed. This window allows you to tag the Job list, set Expiry Date options and when you click Accept, will generate a Course and Class record for each job selected.
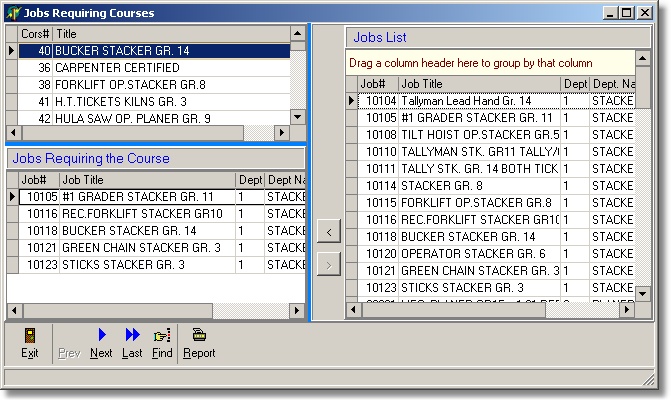
The top right-hand corner of the Courses page displays a list entitled 'Jobs Requiring Course'. This is a list that links the course to jobs that require the course. To edit the list click the 'Edit List' button and the following screen will appear (defaulted to the current course).
You may need to track statistics on people who are not a part of the payroll such as outside contractors working on your site or if your salaried employees are not paid through the Daybreak payroll. Clicking on the 'Non-Payroll People' button on the task bar will display a window that let's you maintain a list of Non-Payroll people. These people will show in the 'All personnel List' when you use the Look-up list option to add students to a class.
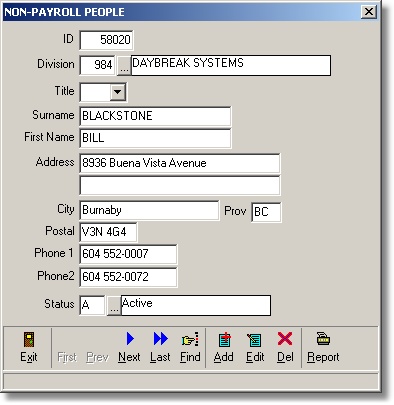
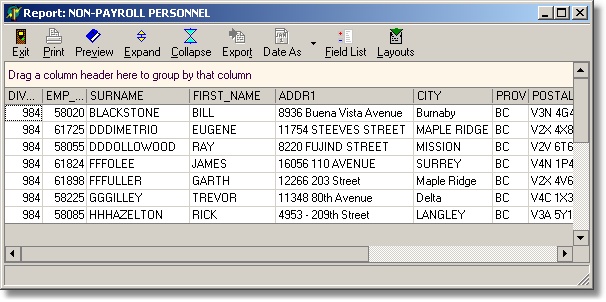
A report on the Non-Payroll people is also available.
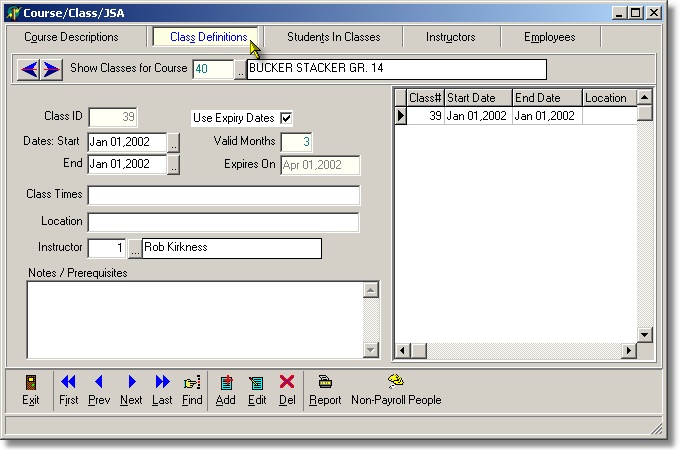
After adding a Course you will need to add at least 1 class. (See Description at start of document).
When adding a new Class the system will automatically generate a unique Class number. The number is the next sequential value for all classes and is not related directly to the course. You will have to complete the following:
If you are using one class list for the course and the student is already on the list then you can either modify the student's passed date (which will automatically adjust the expiry date) or add a new record for the student in order to retain the existing record for history purposes.
Adding StudentsNote: method A or B will add new records for the employees selected wether they are currently on the list or not.
A) Using the look-up list:
Click the 'Add' button on the task bar or the 'Add Student(s)' button and the following list will be displayed. Select student(s) from the look-up list. Use the tag option to select more than one at a time.
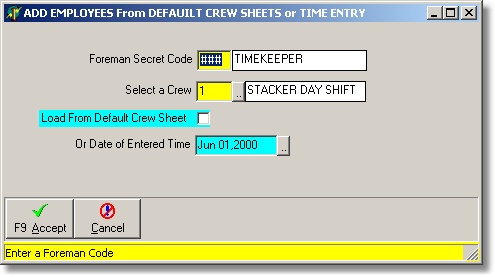
B) Load from Crew Line-ups or time sheets:
Using this option the user can select a crew from the default crew line-ups or from the daily time entry tables. The following window will appear.
Clear Lists: clicking this button will delete all students from the class. A window will appear requesting confirmation.
Delete: clicking this button will delete the students that is currently highlighted. No confirmation is required.
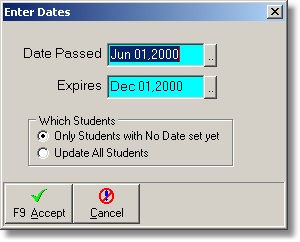
Mark All Passed: clicking this button allows the user to mark all students listed as having passed the class based on the selections shown in the window.
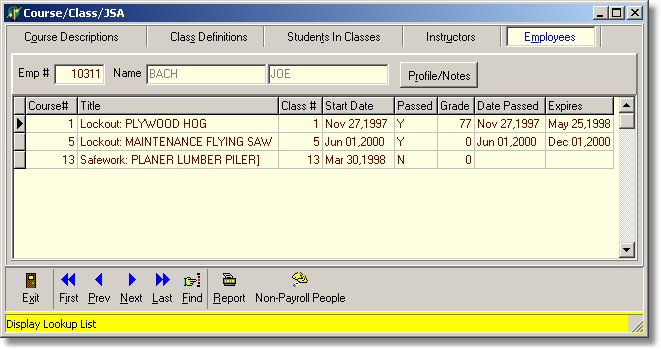
The employee screen displays all classes that the employee has taken and allows access to the employee Profile / Notes window (see EMPLOYEE NOTES for an explanation of the Notes).
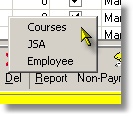
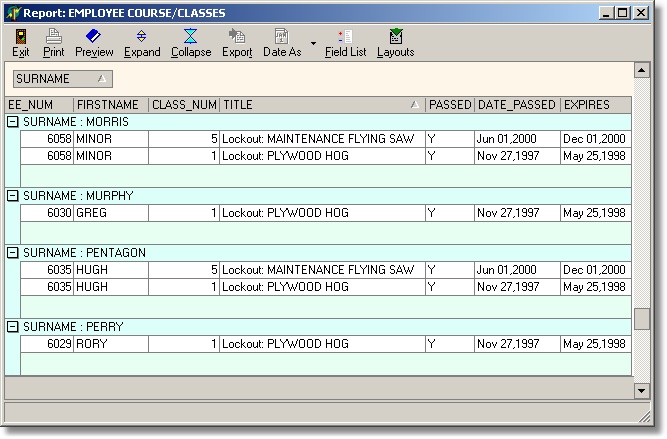
The Course report allows for selection of Courses and/or Classes of and/or Students in classes. To select a report click on the 'Report' button on the menu then select the report.
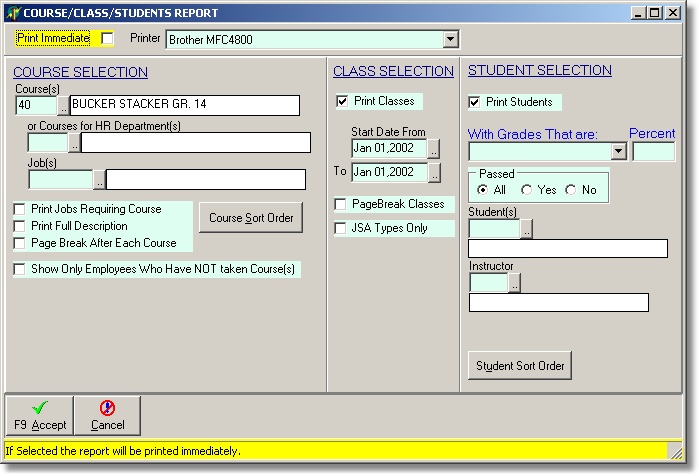
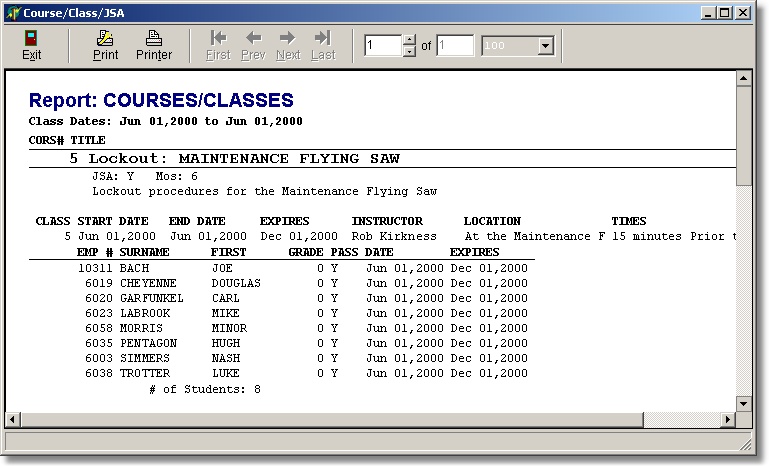
Sample Course/Class/Student Report
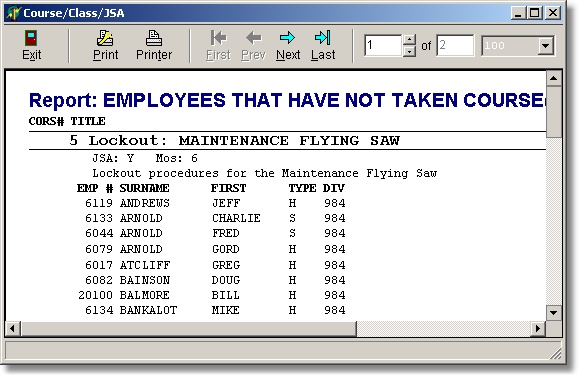
Another useful option on this report allows for finding employees who have NOT taken a course. Set up the selection options similar to this:
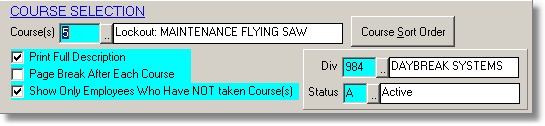
Sample Not-Taken Course Report
The JSA report allows for finding students who have current expired JSA courses or will have expired at a future date. If the 'Expired as of Date' is not entered then all students of the selected course(s) will be listed with their expiry dates. If the 'Expired as of Date' is entered the report will list only students who have or will have expired as of the entered date. You can set the date to a future date to determine how many students will have expired at that point in time. Doing so can help you plan on when future course classes will be required.
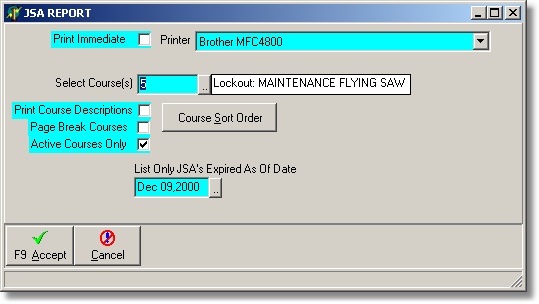
Sample JSA Report

THe Employee report allows for printing one or multiple employes and their course/class history.
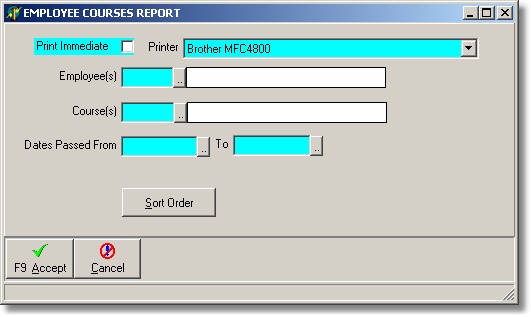
Sample Employee Report
| Table of Contents | Top |