| Daybreak Canadian Payroll/Human Resources System | Table of Contents |
|---|
| BANKED TIME |
Banking Time is an optional feature that you may use if your company policy allows for it. This document will detail the setup and procedures required if you do want to bank time.
In brief: Time to be deposited or withdrawn from an employee's time bank (hereinafter referred to as an Hourbank) is entered via transactions in the Employee-Time, Crew-Timesheets and Journal Entries programs and is posted to each employee's Hourbank when a pay record is created either via the Batch or Manual Cheques programs. All hours banked will be extended to straight-time hours and amounts. Hours withdrawn will therefore be at straight-time.
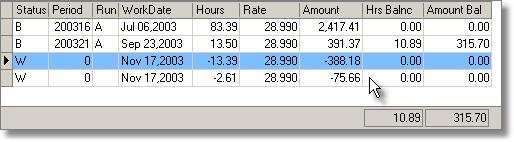
The following screen shows a portion of the Banked-Time report which will be used as a reference in the following explanations.
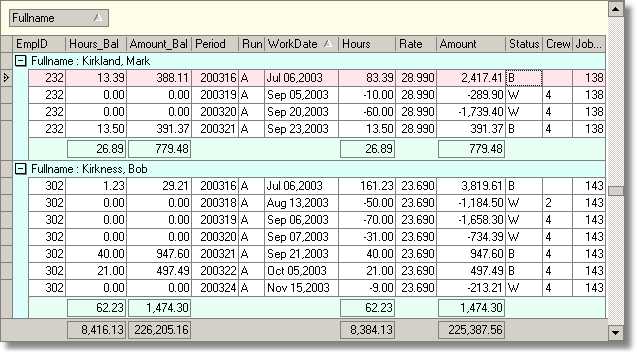
The Hourbank records have a Status field which indicates if the record is a 'B'anked Deposit or a 'W'ithdrawal (or unposted 'T'ransaction in certain reports).
| Description | Hours | Amount | Hours_Bal | Amount_Bal |
|---|---|---|---|---|
| Opening Balance | 83.39 | 2,417.41 | 83.39 | 2,417.41 |
| Withdrawal Sep 5 | 10.00 | 289.90 | 73.39 | 2,127.51 |
| Withdrawal Sep 20 | 60.00 | 1,739.40 | 13.39 | 288.11 |
| Deposit Sep 23 | 13.50 | 391.73 | 26.89 | 779.48 |
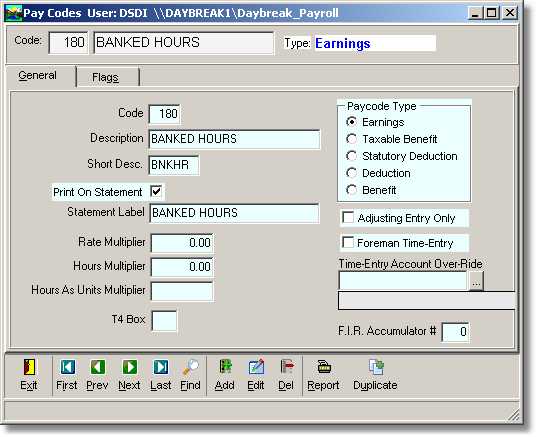
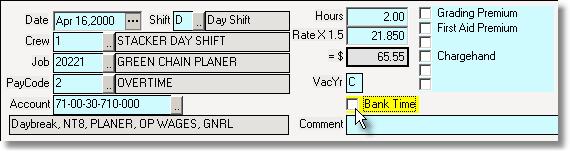
The first step for banking time is to define the required paycodes as follows:
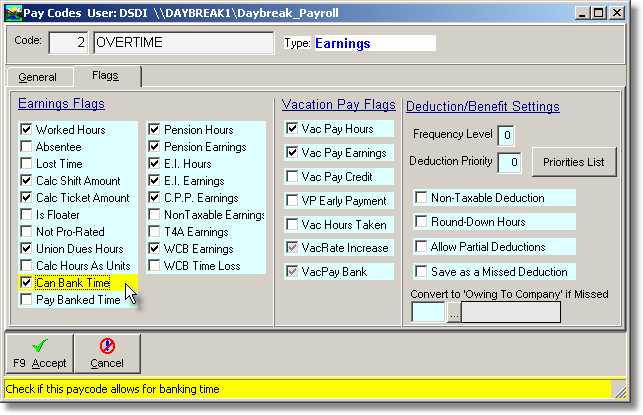

Both the Employee and CrewSheet time entry programs have a checkbox field in the editing panel which will be enabled or disabled according to the rule outlined above. If it is enabled then, to bank the time, just check the checkbox.
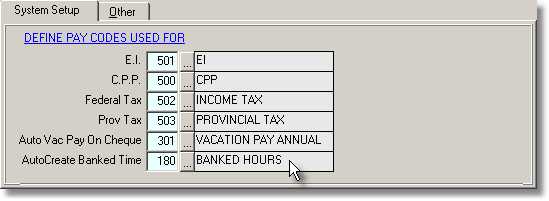
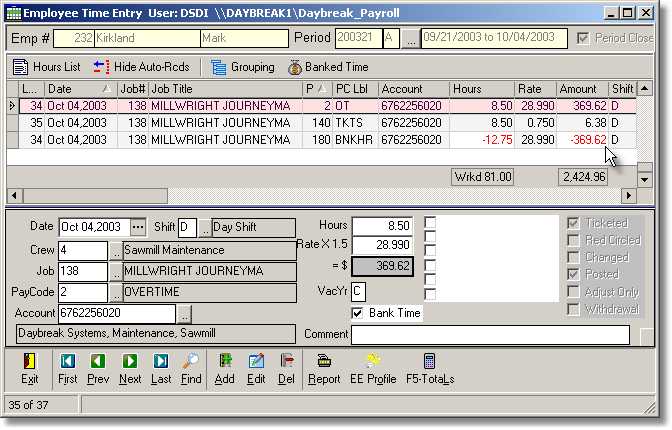
When a time sheet is saved a transaction record will be auto-generated for any records that are marked to be banked. The paycode used for the auto-generated records will be the one defined in the 'System Setup' module. The hours will be converted to straight-time type hours and the hours and amounts will be negative values.
Sample Employee Time-Entry screen showing the auto-generated banked record for an overtime transaction that is flagged for banking.
If, for whatever reason, you do not want to have the time banked then, as long as the originating transaction has not been posted to a pay record, you can uncheck the 'Bank Time' field and the corresponding auto-generated record will be deleted when you save the time sheet.
In order to Withdraw Banked Time you need at least one paycode created that is flagged as a 'Pay Banked Time' as described above. Banked Time can be withdrawn via the Employee and CrewSheet Time entry modules both of which follow the procedures as follows.
As with normal time entry either add a new transaction record or duplicate an existing one and set the fields as required (Date, crew etc.). When a paycode that is flagged as a 'Pay Banked Time' is entered the employee's banked time list is displayed showing any Banked Time records that have a balance.

Enter the Hours to withdraw then click Accept. Note: You can press the 'Withdraw' button first to preview the withdrawal records before clicking Accept. The program will first re-deposit any withdrawals for the date shown and then withdraw the hours requested from the Banked records starting at the oldest record. You may see multiple withdrawal records as each 'B'anked record may not have enough hours to satisfy the hours requested. In the time-entry grid any existing withdrawals for the date will be deleted and new records will be created for the hours withdrawn.

The Hours, Amount and Paycode in these transactions cannot be modified directly. If they are incorrect then you can delete the records to return the hours back to the Hourbank and then repeat the steps to do a withdrawal. As well, if you cancel the time-entry all new withdrawals will not be saved and the Hourbank balances will not be adjusted.
Note: If you want to withdraw a specific number of hours per day (eq; 8.0) you will need to repeat these procedures for each date and only withdraw the hours you want for the day.